2 Easy DIY Projects to Tackle While You’re Stuck At Home
By Anne Pyburn Craig | Summer 2020 | Features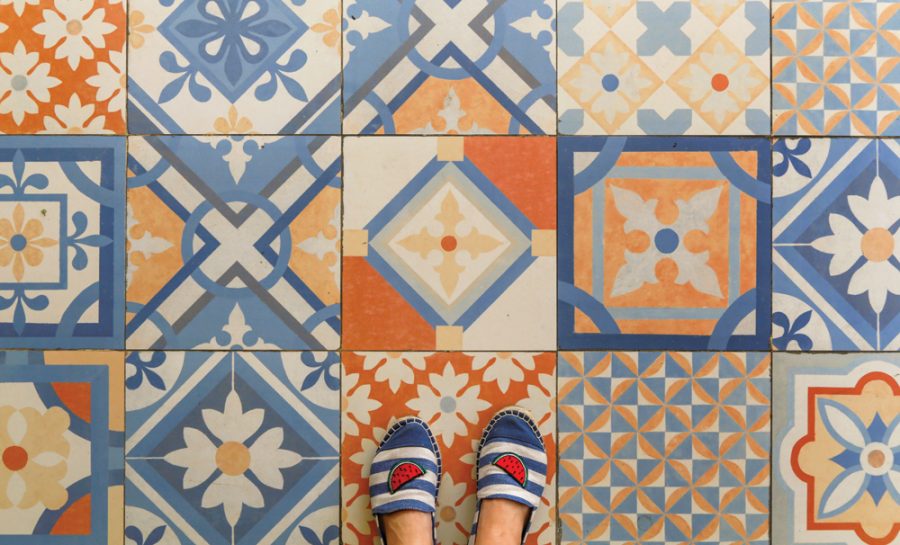
So you’re stuck at home, with more time on your hands than you ever dreamed of, and a sharper eye on your house. Cleaning and reorganizing can only take you so far. No matter your clutter-busting expertise or white-glove standards, it’s impossible for the object of your attention to remain ship-shape. Entropy always wins. But never mind all that. Here are DIY projects that’ll make a lasting difference, indoors and out. Do just one, and you’ll enjoy the rewards long after you’ve put away your tools and washed your hands (yet again). —Anne Pyburn Craig
Bathroom Makeover: Restyle Your Tile
Tile dominates a bathroom’s color scheme, limiting decorating choices. If you’ve inherited tile that you love, then you’re one of the lucky few; read no further. But if you’ve always dreamed of demolishing the stuff, now’s your chance. You’re not having a lot of company, and replacing old tile is just demanding enough to leave you feeling like you climbed Mount Achievement and placed a flag.
Prep Your Space
Measure the floor’s square footage. Make a list for the job: you’ll need mortar, grout, spacers, and sealer, along with a sponge, bucket, pencil, putty knife, grout float, notched trowel, spirit level, and snap cutter or wet saw. Snap cutters are portable, simple, inexpensive tools that work for a range of smaller jobs. Wet saws, akin to table saws, require a learning curve, but can handle larger jobs with speed and precision.
Buy about 10 percent more tile than you need to account for the tiles you’ll inevitably destroy during said learning curve. Decide on a straight grid or offset pattern. Investigate design software such as TilePlanner; it’s built for professionals, but free trials will help you choose a layout and figure out exactly what’s needed.
https://www.instagram.com/p/BvOyv-wh-d3/?utm_source=ig_web_copy_link
Demo!
Get ready for the fun part! With a hammer and putty knife, shatter and pry loose those old tiles, taking care to preserve any you may wish to reuse. A floral that’s too ornate for an entire floor, for example, could make a nice accent in smaller doses.
Your subfloor must be clean and smooth, so vacuum and sponge it down. Invest in underlayment, which helps waterproof and stabilize your work and is designed for superior tile adhesion.
Tiling Time
Find your floor’s center for your starting point. Precision is more than half the battle. Dry-set tiles first with spacers, making any cuts you need and labeling key tiles with painter’s tape; do a full horizontal dry layout. Position full tiles in the center and keep the cut tiles at the edges.
When you’re ready to mix mortar or apply adhesive, follow the manufacturer’s instructions faithfully. Maximize the support the mortar is giving the tile; swirled mortar leaves air space, so experts recommend “combing” mortar into straight lines. Your goal is even, 1/32-inch coverage.
Setting tile is like assembling a jigsaw puzzle, but with lasting consequences. It’s easier to show than tell how to do it, so check out expert guidance on YouTube. When everything is grouted, set, and done, you’ll have a spiffy new bathroom and serious bragging rights.
Raised Garden Beds
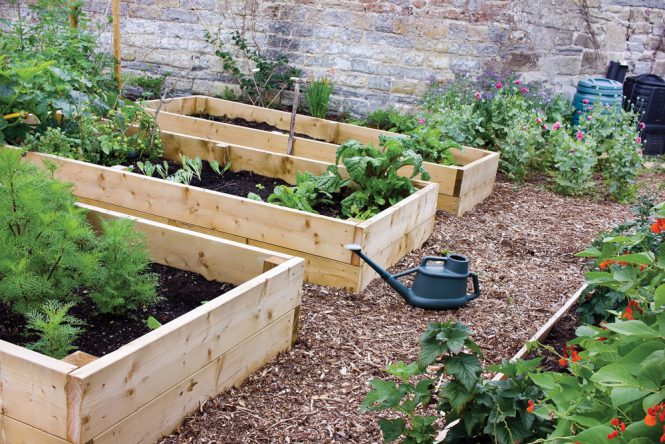
The advantages of raised bed gardens are many. Working on them is easier on your back, you can locate plants more easily than when they’re planted in the ground, and less weeding and pest control are needed. A properly made raised bed has great drainage and keeps soil from compacting. Your plants will love you.
Raised beds are containers without bottoms, and can be made from pretty much whatever you want: scrap wood, recycled pallets, corrugated metal, cement, bricks, or stones. You can also grow plants in old truck tires, discarded kiddie pools, vintage bathtubs, or wagons (although a raised bed with a bottom is technically a planter box). All you need is something that holds soil, is less than three feet across (you want to be able to reach everything), and drains well.
Make A Plan
Decide what kind of plants you want to grow, and you’ll know whether you want sun or shade. Plants sharing the same bed should be “companions” known to thrive in proximity.
Choose your material. Unfinished cedar makes lovely boxes. Landscaping timbers are the most fun you’ve had since Lincoln Logs. If you’re handy, consider adding tiers or a bench along one side.
https://www.instagram.com/p/B8PoQ23A4Vr/?utm_source=ig_web_copy_link
Dig It!
Once you’ve figured out your size and location, work the earth just enough to loosen it up and create good drainage.
After installing the raised bed’s sides, it’s time to pour in good topsoil. Since topsoil is sold by the cubic foot, it’s easy to figure out how much you’ll need. Mix some organic compost for a nutrient-rich environment, and you’re ready to plant.
Raised bed gardens do get dry a little faster than in-the-ground gardens, so keep a close eye on hydration. But as any gardener can tell you, it’s less hassle to water on your feet than it is to weed on your knees.
General garden wisdom can be found on Margaret Roach’s blog or Cornell Cooperative Extension.